7/24/2013

Fun and Romance on a Budget

      Wishing for a little romance with that significant other, but can't think of anything than the typical going-to-the-movies-then-dinner date?  Having an even harder time thinking of a non-typical date and staying within a budget?  Look no further, as I found a neat website that lists 50 fun and cheap date ideas!

      I'm not saying that those dates (like the movie-then-dinner and vice versa, the grab-coffee/lunch/dinner, or the crazy-expensive-trips-to-amusement-parks, etc.) are not fun; most of them are a classic and it is the time spent together that makes it enjoyable.  But, a little variety in how to spend time together might just be as fun, if not more fun, as both parties stumble into a new (and fairly inexpensive) activity together.  Heck, it might feel like a first date.

Here's a few (untried, so not-yet-approved) ideas that I'd add to the list:

  1. If you haven't done so, walk around the neighborhood and explore the little shops/parks.
  2. Do chores together (like walking a pet, washing a pet, gardening, getting a haircut, washing the car, etc.)
  3. Start a scrapbook storybook together.

      I hope the list inspires others to try a non-typical date activity. I'm eager to try some of them too.  Just remember, that for the date to work, both partners need to plan together to lessen the stress of having to plan everything by a lonesome self.  Good luck and may you all have fun :)

     Here's that link again:

"50 Best Fun (+ Cheap!) Date Ideas"

7/09/2013

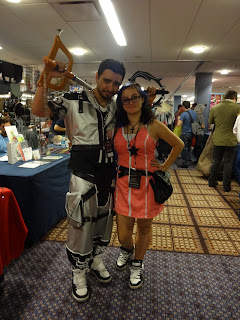
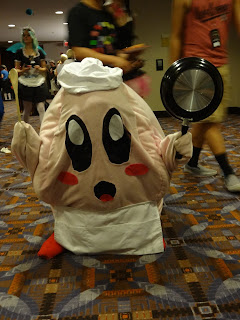
Japanese Media Fans Unite at Anime Midwest

Cosplay
[kos-pley]
noun

  1. the art or practice of wearing costumes to portray characters from fiction, especially from manga, animation, and science fiction.
  2. a skit featuring these costumed characters

    -definition from dictionary.com

      Anime Midwest is a smaller weekend convention compared to ACen.  This convention is contained in one hotel, Hyatt Regency O'Hare, whereas ACen spanned about 2 more hotels in the vicinity.

      I joined friends to partake in the adventure seeking fun and new memories.


      There were many things to do like play video games, arcade games, board games; attend panels, unofficial photo-shoots, rave, karaoke, merchant hall; and meet fellow fans and cosplayers.

      Because Anime Midwest was small, it was able to afford free instant ramen (cup noodles) and a glass of soda for their guests.

      My experience about the whole weekend was delightful!  The only faults I perceived was that there weren't many panels or big enough rooms to house the guests.  Karaoke room was small, perhaps they didn't expect a huge turnout.  The variety of cosplays was limited; most of them were of the popular fandoms.

      Positive notes about Anime Midwest were that the participants and the staff are friendly, with the exceptions of a few of them.  (A lost iPhone was never found after a few minutes of being accidentally unattended.  Come on, think about how you'd feel in my shoes.  Just return the items.)

     Anime Midwest appealed to younger audiences and parents who love anime and such because of how affordable it is ($35 for badge alone) compared to ACen ($45 for badge alone).  There were many parents who brought their children to share in their interests.


      The location was also near home, Chicago, and neighboring states/cities; ideal to draw in the numerous fans that live here.

      I would go again in the following years, with the exception for next year. July 4 will land on a Friday of the Anime Midwest weekend, so I don't think I could make it.
   

      Tip to the guys and gals who decide to go in the future, make sure to turn on your streetpass for your 3DS!  You'll be running into a lot of people who play ;)  Also bring chargers and power strips.  Bring patience and don't forget to have fun too.

7/05/2013

Some News!

Hey everyone!

      I wanted to let you know some current happenings with yours truly since there weren't any recent updates in a few days already (and still may be more delays to come).
1.)  I am still working on that video tutorial for the fuzzy coat.  It is still a lot trickier than I thought.
2.)  This weekend (from today to Sunday), I will be at Anime Midwest!  I'll be sure to spot some awesome cosplayers (and take their pictures) ;D
3.)  My right eye is swollen, but that's not enough to keep me in bed!  Sure it will slow me down; it still won't be enough to keep me from inactivity! *determined*

      I will be back soon!  Sorry for the video tutorial being late, but I will make it up to you via pictures of Anime Midwest cosplayers and what-nots :3


See you all soon!

-Jiggs

7/03/2013

That Fuzzy Coat Tutorial


The long awaited tutorial (that I promised a long while back) is finally underway!

Looking neat and nice

      Yes, the time is near.  It's almost 4th of July and the weekend of Anime Midwest convention!  With no scheduled work in the following days, I'm seizing this opportunity to paint my nails and finally finish this tutorial.  Woohoo!

Just experminenting

         If you have further questions and concerns, don't be shy to leave a comment!  :D

~*~*~*~*~*~

Sally Hansen's Fuzzy Coat Tutorial


Tools

    Just like salad dressings, don't forget to lightly shake the bottles to mix the contents!
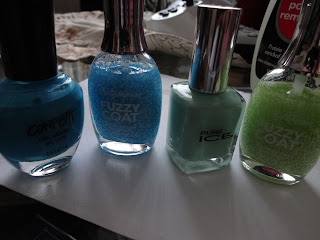
  • nail polishes:
    • Sally Hansen Fuzzy Coat
    • a solid color 
    • clear top coat (optional)


Steps

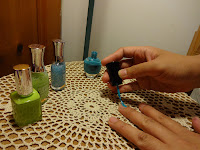
  1. Apply a solid color coat to the nail and then let dry.  
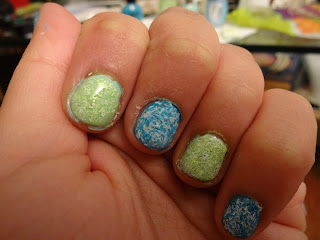
    • I chose a blue and a greenish hue to go with the Wool Knot Fuzzy Coat  and the Fuzzy Fantasy respectively. 
      I changed my mind about the solid green I was going to use
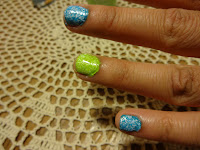
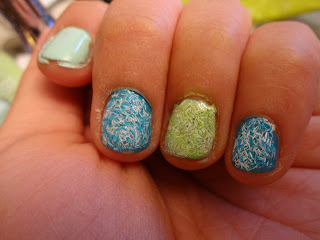
  2. Carefully dab the nail with the fuzzy coat polish and spread it.  Apply more fuzzy coat as needed to cover the whole nail.  Wait for the polish to dry.  (This will take longer than the first coat).
    • It took me several tries to fully understand how to manipulate the nail polish on the nail, so don't be discouraged if it isn't turning out neat.  If you feel confident, you can try pushing the fuzzy coat around with your finger tip while it is still drying on your nail.
      For my first attempt, the base color was different for the green one.

      I still think it's cool, even if it's amateur work.
  3. Apply a clear top coat to the dried nail polish if you want the nail polish to last longer. 
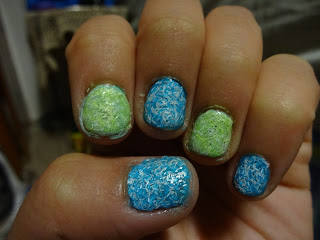
  4. Show off your fuzzy coat nails :)
I didn't bother cleaning it up before taking the picture.

            For my next project, I will attempt creating a video tutorial of how to apply the fuzzy coat.  Stand by and wish my luck!  

6/29/2013

Pure Ice Finally Has A Website

      While walking around Wal-Mart, I found a display box featuring Pure Ice nail polish.  To my surprise, they listed their official website on the carton:

pureicecosmetics.com


      The website is so new that there aren't even a whole lot of pictures up to display their cool collection.  There's not a lot of content so far, but the website did list their entire collection!  How exciting is that!  The pictures they do have uploaded don't seem to work in Google Chrome, and I haven't tried any other web browser.  I am pleased that Pure Ice finally has an official website and am looking forward to more uploads/news from them.

There were ones made in the U.S.A!
      While I wait, I bought more nail polish to keep me busy :3


      --> My face right now (>w<)!!!

6/27/2013

A Heart-Warming Birthday Gift From My Best Friend

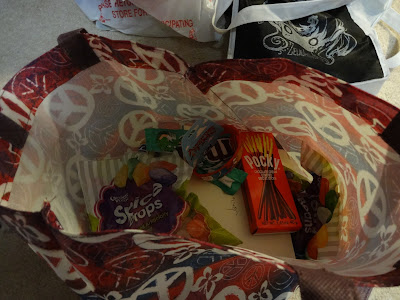
      It's been 3 weeks since my birthday and my friend Jason showed up twice at my workplace looking for me, determined to present me with his gift.  Just before I clocked in for work, he handed me a large bag with lots of chocolates, Adventure Time gear, and a birthday card from his parents.

Pocky!  Long time, no encounter!

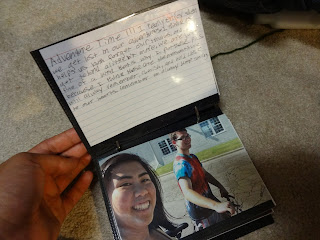
      8 hours of good and hard work later, it was time to go home for the night.  While I waited for Dad to pick me up, I rummaged through the goodies in the bag.  At the bottom I found a small, but thick, photo album.  It was a simple gift, but I found it to be the most sentimental one out of all of the things in the bag.

Great quote!

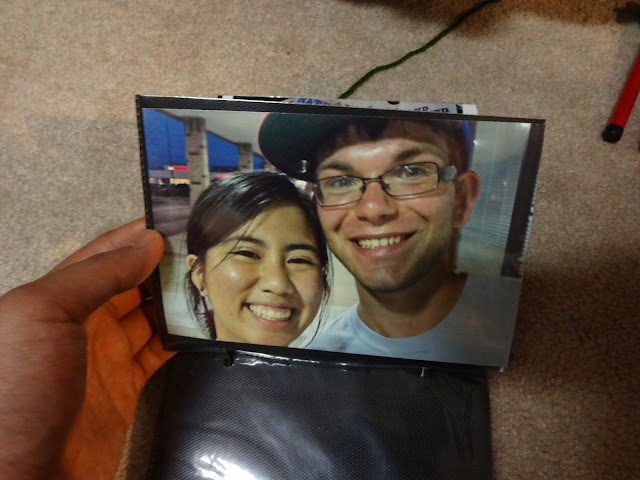
      The photo album contained notes and commentary from Jason complimenting the pictures of me, him, and others in different occasions.  His commentary were heart-felt.  Jason's creative gift is worth noting because most of us forget that it's not about the material things we receive, but the memories they capture.

I remember that day.. *Reminisce*
      As human beings, we put sentimental value in objects because it reminds us of a special someone or occasion.  A gift like this photo album, filled with precious memories of ours, warms my heart because it wasn't a usual present.  He gave me a remembrance of how he and I felt during the moments captured in the photos he chose to include in the album.  That really is what I call crafty.

      Jason, if you're reading this, thank you very much for your present.  It is such a joy going through the album page by page.  I couldn't stop smiling and chuckling while going through the memory lane you put together.  Let's capture more pictures together as we go through life being the best a friend can ask for.
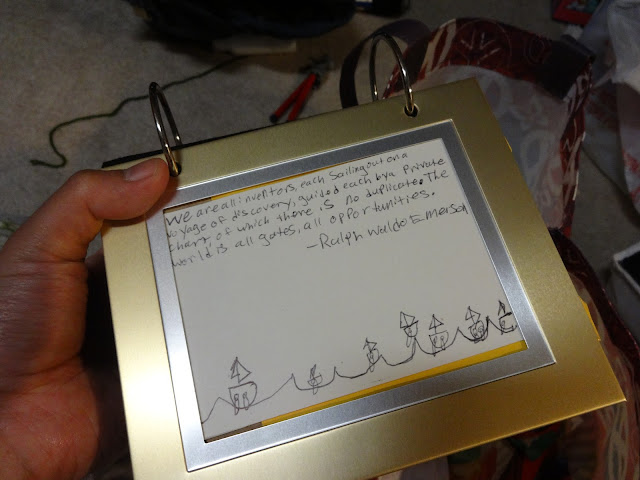
 As written on the cover of the photo album:
"We are all inventors, each sailing out on a voyage of discovery, guided each by a private chart of which there is no duplicate.  The world is all gates, all opportunities." - Ralph Waldo Emerson
  I am glad that our paths intertwine in our respective private charts.  I hope it stays that way for a very long time.

Great End!  *Reminisce some more*

6/24/2013

From Useful to Useful Again

      On top of being a regular phone, smart phones can act as a camera, a voice recorder, an alarm clock, a game console device, an MP3 player, PDA, as well as be able to connect to the internet like regular laptops.  So many people have smart phones and only have to keep track of one wire.  For me, I still own a simple cell phone.  I have a point-and-click camera and a 3DS with their own individual chargers and USB connector.  I needed a way to organize these wires so they don't wind up "inseparable".

This should keep them from tangling.

       I got this idea from my brother who has a shoebox with toilet paper tubes storing his individual wires.  I thought I could do the same, but decorate it too.  Here's a tutorial for anyone curious as to how my cousin and I went about it.

~*~*~*~*~*~

Tube Containers

We forgot the scissors.  And other things.

Tools


  • toilet paper tubes
  • scissors
  • pencils and eraser
  • markers and colored pencils
  • glue
  • construction papers


Steps

  1. Cut a construction paper evenly in half hot-dog style.
  2. Hotdog styleHotdog style
  3. Cut the same construction paper evenly in half again, hamburger style.  The length of the paper should be enough to cover a single toilet paper tube.
    Hamburger style
  4. Fold the paper in half.  Crease the fold and then unfold the paper.
    It's the easier steps.
  5. Fold one end of the paper to the middle and then crease it.
    A little more difficult, I guess.
  6. Do the same to the other side and then fold the whole thing in half.
    Sweating yet?Almost there!

    Thank goodness that's over!
  7. Using a pencil, draw a design you want to cut out.  I used half circles on the edge to create full circles when the paper is unfolded.  
    I added hearts to the other edge.
  8. Cut out the design and then unfold the paper.
    Be carefulIt turned out nice!
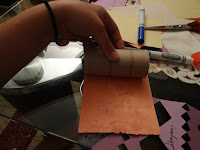
  9. I layered the paper on top of another that was not designed, then glued them together.
    Orange seems like a nice background color.I haven't experimented with liquid glue.

    The papers are a bit stiff.
  10. Using markers and colored pencils I decorated the papers.  You can use whatever decorations you'd like (stickers, collage, etc.). 
    It came out well! :D
  11. After decorating it, glue the construction papers to the toilet paper tube. If you're using a glue stick, make sure to tie a rubber band around the whole tube and wait a day before removing the band.  This will ensure that the glue dries on the tube and won't come off easily.
    Don't let the glue dry on the papers!

    Yarn and wires and a fish line
  12. Carefully fold your wires and place in the tubes and voila!  A newly decorated tube container is pretty and ready to hold your wires!
    Yay!  First tube done!The other side


I hope yours turned out well too, if not better!